XVID3 V3
FPV Analog Video System
Long Range up to 100Km (LOS)
(+34) 615 18 50 77
XVID3 V3 | Updated Version 2024, Range 25-100Km
Diversity video receiver RXVID3V2 and video transmistter XOSD3B.
Professional analog video system prepared for all types of applications FPV to work between 25-40Km (LOS) with antennas included in the kit or 100km if you use high gain parabolic antennas.
Prepared for all types of vehicles:
UAV, Drone, Helicopter, Cars, Boats, Robots, etc.
The XOSD3B video transmitter is compatible with any autopilot that uses the Mavlink protocol:
APM, Cube, pixhawk, etc.
Control video system functions from any XLRS transmitter:
Auxiliary servo control, camera selection, brightness level, page change, etc.
You can choose several XVID3V2 video systems with the same frequency 1.2Ghz, 2.4Ghz, 5.8Ghz or in different frequencies to have a redundant video system 2.4Ghz-1.2Ghz, 1.2Ghz-5.8Ghz, 2.4Ghz-5.8Ghz.

Version 3
As a novelty in the RXVID3D V3 video receiver, now the video receiver modules for diversity mode can work individually, which means that a single frequency can be used in the two RX modules or each module in a different frequency to have a redundant system and working in diversity mode, with which the system will automatically select the RX with the highest signal.
A new screen a little bigger than the previous one and with color to clearly show each data of the video system, (Video signal level, Video channel RX1, Video channel RX2, Video channel TX1, battery level, alarms…).
More information to select frequency band…
RXVID3 V3 | Analog video receiver 1.2 , 2.4 or 5.8Ghz with internal video transmitter 5.8Ghz
On Ground
It has two internal individual video receiver modules that work in diversity mode.
Depending on the XVID3V2 video system you have selected you can have the two recevier modules working on the same frequency or each receiver modeule on a different frequency, in this way you can have the RXVID3V2 receiver working on twok different frequencies to obtain a redundant video system..
The RXVID3V2 video receiver can work in different modes:
Diversity, Manual RX1 or Manual RX2.
The diversity mode is automatic, the RXVID3D V3 has two antenna inputs and internally it will select the receiver module with the best received video signal.
By default the receiver module (No.1) has the directional antenna connected for long range and the receiver module (No.2) has the omnidirectional antenna connected for short range, in this way you will get a good combination of antennas and good video signal for short and long range.
Manual modes, when selected (Manual RX1 or Manual RX2) at this time only one video receiver module will work.

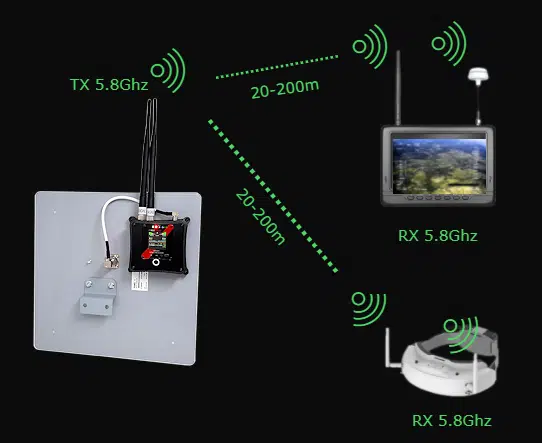
Also has a 5.8Ghz short range video transmitter to view the video in wireless mode with one or more video glasses or video FPV monitors with 5.8Ghz receiver, you can get ranges of 20 – 200m or more depending on the antenna.
You can see the same video link from several different devices at the same time that they have an integrated 5.8Ghz video receiver, for example, see the image from 1 FPV monitor and from video glasses.
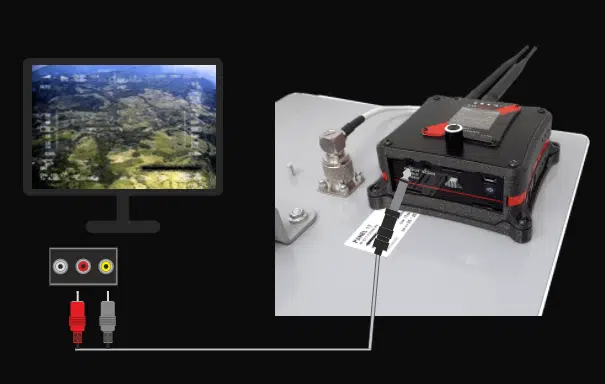
It includes an Audio / Video output through a mini jack connector to connect the video by cable to a standard screen through the RCA connector or by HDMI (Using an adapter).
A 3.5mm Mini Jack to RCA cable is included in the XVID3V2 kit.
If you need to connect two displays you can connect a dual mini jack splitter adapter to the mini jack connector of the RXVID3V2 and it will display the video on both monitors at the same time.
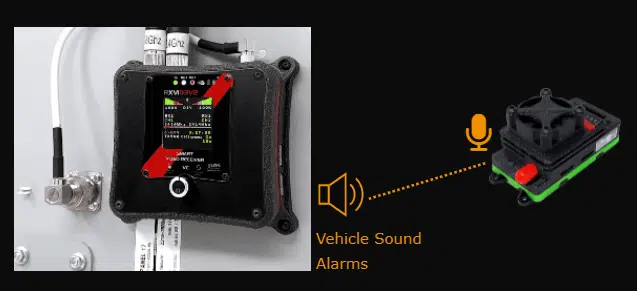
The RXVID3V2 video receiver has a small speaker to listen in real time to the sound sent by the video transmitter XOSD3B from the vehicle and for device internal alarms of the XOSD3B and RXVID3V2.
You can configure each parameter by accessing the display menu from the encoder, by pressing the encoder you can select each parameter and to change the values you only have to turn the encoder and they will change instantly.
From the menu you can configure:
– RXs operating mode: Manual RX1, Manual RX2 or Diversity.
– Video Channel RX1 (1.2, 2.4 or 5.8Ghz).
– Video Channel RX2 (1.2, 2.4 or 5.8Ghz).
– Video Channel TX (5.8Ghz).
– Turn ON or OFF video TX.
– Reset time..
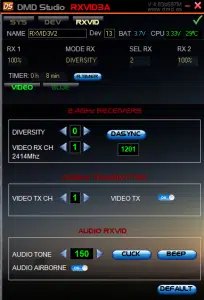
Another way to configure the RXVID3V2 parameters is by connecting to the DMDStudio software that works with Windows 7 or higher through USB port.
Has an internal battery 3.7V 5.000mAh with a duration of 8-10 hours, it charges through the USB port.
Optionally for other types of applications, for example: fixed video repeaters. The RXVID3V2 is ready to connect an external battery. (Send an email to sales@dmd.es if you are interested in this option).
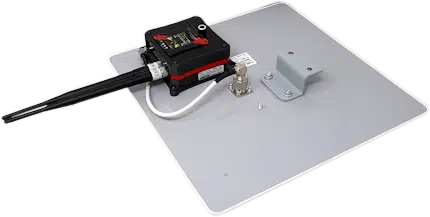
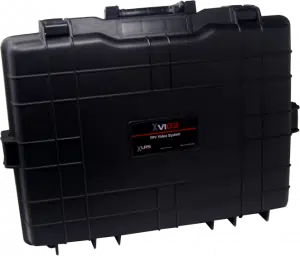
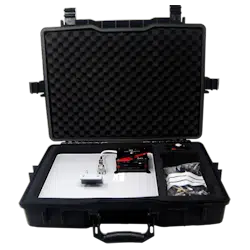
The video receiver and antennas come with a robust suitcase to transport the entire video system safely and easily.
As the RXVID3V2 is integrated in the directional antenna, it is ready to use and if you use the TRI270 tripod, the installation is very simple since you will not need adaptations, just install the antenna with the knobs, connect the antennas and turn on the RXVID3V2.
Ready to fast install, without complications, without tools.
Get to the job site, unfold the tripod, position the antennas with the knobs quickly without the use of tools and ready to work.
The complete installation can take about 2-4 minutes.
You don’t need to see the assembly manual, the installation of the tripod and antennas is very intuitive.
Optionally you can purchase TRI270 tripod with T-Bar which is specifically adapted to place several types of RC and Video antennas quickly, ready to install (Plug & Play).
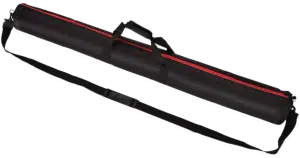
It is mechanically prepared and with accessories to install antennas as: BQ89, MX433, ANTPLA24G17DB or similar, it can support up to 25Kg of load, it is extensible up to 2.70m, it folds easily and has a transport bag with internal padding to protect against bumps in daily work.


XOSD3B | Analog video transmitter 1.2 , 2.4 or 5.8Ghz with OSD integrated
In the vehicle
Video transmitter with 1W (+ 30dBm) of RF power and depending on the device it can work in 1.2Ghz, 2.4Ghz or 5.8Ghz with 8 video channels, can be powered from 8-18V, inputs for 2 video cameras with PAL format, 4 auxiliary RC channels (Control only from XLRS transmitters), 1 input Mavlink for to connect the telemetry of the autopilot and a Female-SMA connector to connect an extender together with the omnidirectional antenna.
Weight: 72g.
Dimensions: 82 x 37 x 39mm approx.
Box: Plastic and fiber base 2mm.
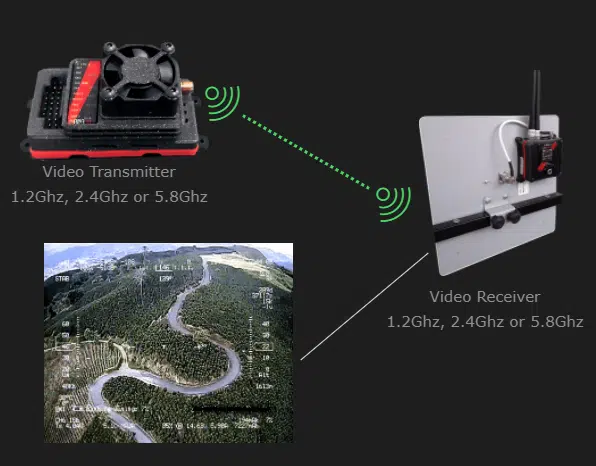
OSD presents graphics, icons and W/B texts on the screen, superimposing the objects on the analog video. It is mainly oriented for the visualization of the instruments of an aircraft and flight data on planes, helicopters and radio control systems FPV, Unmanned Aerieal Vehicle UAV , robots, vigilance, etc.
Displaying the data of the XLRS radio link and the instruments using the Mavlink telemetry of the autopilot, flight data, alarms, battery status, video channel, selected camera, OSD brightness, etc.
Configurable objects, pages and others parameters through DMDStudio software.
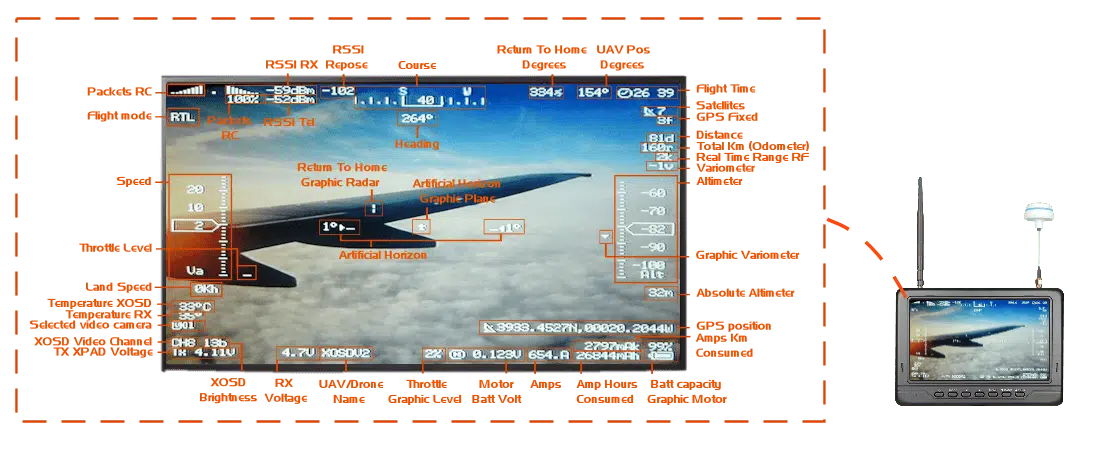
Visualize digital RSSI in text and graphics of the receiver, telemetry and background noise.
Visualize the range of the Radio Control system in real time according to the quality of the radio system link and the RF noise.
Temperature sensor of precision visible as a parameter on the screen (XOSD temperature and XLRS receiver).
Temperature alarm, according to configuration, automatic disconnection by high temperature.
Internal microphone with audio preview and digital volume control.
Voltmeter of 5V.
Motor-Accelerator Graphic position display and % or Watts.
Battery Voltage Up to 65V. (If hardware device supports).
PLANE MODE Autopilot Mode. Manual, Auto, Stab, etc, 19 configurable modes.
3 Pages selectables and configurables.
3 Character sizes:
– 64 characters x 32 lines (Smaller characters).
– 41 characters x 32 lines (Medium characters).
– 31 characters x 32 lines (Large characters).
Course return to home (RTL) numeric and graphic.
Angular position aircraft for positioning antennas.
Video Channel.
Video brightness level.
Selected camera.
Battery voltage XLRS Transmitter.
XOSD power supply voltage.
UAV/Dron Name
And many more…
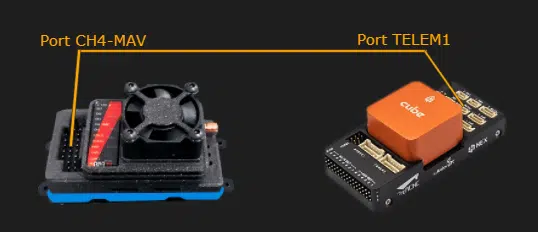
XOSD3B has 1 Input for Mavlink Telemetry it connects directly to the mavlink telemetry port of the autopilot (GND, TX) and operates at 38400 baud.
Compatible with any autopilot that works with the Mavlink protocol such as: Cube, Pixhawk, APM, etc.
2 Inputs for video cameras with PAL format, the video cameras can be powered from 7,5V to 18V. Only the selected camera is powered, saving consumption.
– Display selected camera: If you use 1 XOSD you can only display 1 camera at a time.
– Two simultaneous cameras: To display 2 cameras at the same time you will need 2 XOSD and 2 RXVID, each pair TX / RX in a different video channel.
– 2 cameras with different voltage: You can connect a camera (12V) and feed it through the XOSD and the second camera (12V or 20V) connected to the CAM1-2 port and only to the pins (GND and Video Signal), the 12V power must be separated with the 0V common.
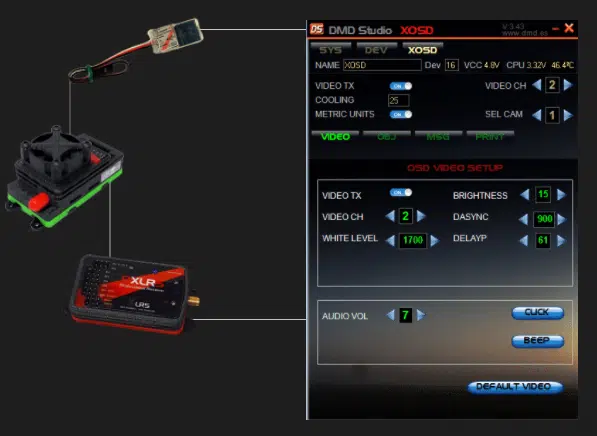
To configure the parameters of the XOSD3B video transmitter is done from the DMDStudio software, to configure the parameters from the PC you can connect in two ways:
1- Directly using the BOOTADMD device, connect to the RCBUS port of XOSD3B and connect via USB to the PC – DMDStudio (BOOTADMD sold separately).
2- Or If you have an XLRS system (RXLRS), you can connect the RCBUS port of the XOSD3B to the RXLRS receiver and connect via USB to the PC – DMDStudio.
In DMDStudio you can change some parameters of the video transmitter: Brightness, pixel level (White-Black), microphone volume, configure OSD objects, etc.
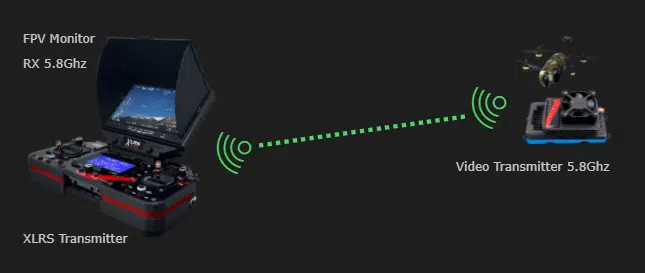
If you have selected the XOSD3B with a 5.8Ghz video transmitter, you can use it directly with an FPV monitor, video glasses or a similar standard video receiver system in 5.8Ghz.
In this way for short range applications, it isn’t necessary to use the RXVID3V2 receiver.
A low cost and portable option for short range applications is to use it in conjunction with an FPV monitor and XPAD2 or XPAD3 transmitter (RC & Telemetry).
If you have an XLRS system, you can connect the RXLRS receiver through the RCBUS port to the XOSD3B and you can control various functions of the XOSD3B video transmitter in real time from the XLRS transmitter (RX & Telemetry).
– Select the camera: CAM1 or CAM2.
– Change the TX video channel.
– Change the brightness level.
– Change Pixel Level.
– Select the OSD pages: PAG1, PAG2 or PAG3.
– Control the 4 auxiliary RC channels.
– And much more…

Note: Analog video systems with powers greater than 25mW or 100mW at 2.4Ghz, 5.8Ghz, shouldn’t be used in Europe, except authorized users. For governmental or military use, depending on the country, you can use frequency band of 1.2-1.3Ghz.
An RF attenuator can be included in the output of the video transmitter to comply the standards of each country.
Select your video system
1.2Ghz: Select this band only when it is essential.
2.4Ghz: Use this band if you want a good combination of range, sharpness and directionality, preferably use outside the city since the band is saturated.
5.8Ghz: It has greater sharpness, less range. Less saturated band.
5.8Ghz: Economical option. Use only an XOSD3B and an FPV monitor or video glasses.
5.8Ghz: Portable option and good price. You can also use an XOSD3B with an RC transmitter XPAD + FPV monitor.
More information to select frequency band…
Made in Europe by us, DMD (Digital Micro Devices).
We are regular manufacturers of Analog Video systems for professionals.
Depending on the project and quantity, we can manufacture customized Analog Video XVID3V2. More info…
If you are interested contact us sales@dmd.es.
Digital Micro Devices S.L Copyright © 2024
